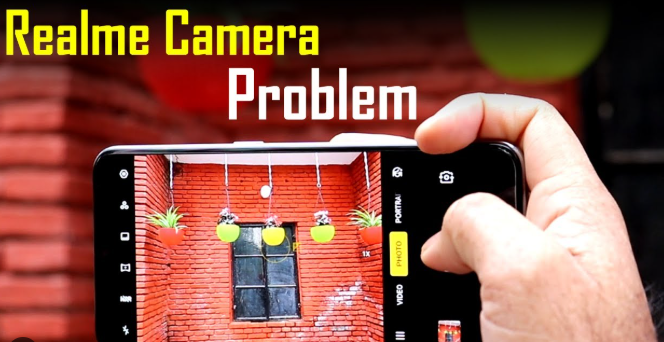
Remember that frustrating time when your brand new Realme phone took blurry, disappointing photos? It’s a common problem, and thankfully, it’s often fixable. This guide helps you troubleshoot Realme camera quality problems, providing solutions to improve your smartphone photography. You’ll learn how to identify the issue, adjust settings, and get the sharp, vibrant images you expect from your Realme device.
Troubleshooting Realme Camera Issues
Cleaning the Lens
- Gently wipe the camera lens with a microfiber cloth. Even tiny smudges can significantly impact image quality. A small amount of dust or a fingerprint can cause blurry photos or noticeable streaks. Ensure the cloth is clean and free of abrasive particles.
- Use a lens cleaning pen or compressed air for stubborn debris. These tools are designed to safely remove dirt and dust particles without scratching the lens surface. Avoid using harsh chemicals or abrasive materials.
Checking for Software Updates
- Regular software updates often include camera improvements and bug fixes. Realme regularly releases updates to optimize camera performance and address known issues. Checking for updates is a simple yet effective first step.
Restarting the Phone
- A simple restart can resolve temporary software glitches that affect camera functionality. Sometimes, minor software errors can interfere with camera operation. A restart clears the system’s memory, allowing the camera to function correctly again.
Camera Settings Optimization

This section focuses on optimizing Realme camera settings to improve image quality. We’ll explore various settings and their impact on photo clarity, sharpness, and overall aesthetic appeal.
Adjusting Resolution and Aspect Ratio
- Higher resolution settings capture more detail, leading to sharper images. However, higher resolutions require more storage space. Experiment with different resolutions to find a balance between quality and storage.
- Different aspect ratios, like 4:3 or 16:9, affect the composition of your photos. Experiment with these to find which best suits your style and subject matter.
Understanding HDR Mode
HDR (High Dynamic Range) mode enhances photos by capturing details in both bright and dark areas of a scene. It helps to reduce overexposure in bright areas and underexposure in shadows.
Using Night Mode
Night mode is designed for low-light photography and uses longer exposure times and image processing techniques to reduce noise and improve image brightness. It’s incredibly helpful for capturing clear photos in low-light environments.
Exploring Pro Mode
Pro mode offers manual control over settings such as ISO, shutter speed, and white balance, allowing for greater creative control and the ability to correct specific camera issues.
Advanced Troubleshooting for Realme Camera
For persistent Realme camera quality problems, this section delves into more advanced troubleshooting techniques.
Clearing Camera Cache and Data
- Clearing the camera app’s cache and data can resolve issues caused by corrupted temporary files. This process deletes temporary files and data stored by the camera application without affecting your photos or videos.
Checking for Hardware Damage
- If software solutions don’t work, inspect the camera lens for any physical damage like cracks or debris. Physical damage can be identified by examining the lens for any visible scratches, cracks, or other abnormalities.
Factory Reset (Last Resort)
A factory reset is a last resort to address underlying software problems. This reinstalls the operating system, which might resolve deep-rooted software issues affecting the camera.
Real-Life Example: Blurry Photos in Low Light
- A user reported blurry photos taken in dimly lit restaurants. After trying different settings, and clearing the cache, the issue was resolved by enabling Night mode and using a steady hand or tripod.
Real-Life Example: Overexposed Images in Bright Sunlight
- A user experienced consistently overexposed images when taking outdoor photos in bright sunlight. The problem was solved by adjusting the HDR settings, reducing the exposure compensation, and utilizing the shade for optimal lighting.
Myths about Realme Camera Problems
Myth 1: All blurry photos are due to hardware failure.
Many blurry photos are actually caused by software glitches, incorrect settings, or simply a shaky hand. A significant number of issues can be addressed through software updates, settings adjustments, or improved shooting technique.
Myth 2: A factory reset will always solve camera problems.
While a factory reset might resolve some software-related issues, it’s not a guaranteed fix for all camera problems. Hardware problems will require professional attention or replacement.
Myth 3: Higher megapixels always equal better quality.
While higher megapixel cameras can capture more detail, it’s not always a guarantee of superior image quality. Other factors like sensor size, lens quality, and processing capabilities also play a crucial role in overall image quality.
FAQ
What should I do if my Realme camera is completely unresponsive?
Try restarting your phone. If that doesn’t work, check for software updates. If the problem persists, consider a factory reset (back up your data first!). If still unresponsive, it might indicate a hardware issue requiring professional repair.
Why are my Realme camera photos so dark?
This could be due to low light conditions, incorrect exposure settings, or a problem with the camera’s metering system. Try adjusting the brightness, using night mode, or checking your camera’s ISO settings.
My Realme camera photos are blurry. What can I do?
Ensure the lens is clean, check your focus, try different camera modes, and examine the camera settings (such as image stabilization). If the problem persists after troubleshooting, consider a factory reset.
Why is my Realme camera app crashing?
App crashes are often due to software bugs or insufficient storage space. Try clearing the app’s cache and data. Installing updates or performing a factory reset may also resolve the issue.
How can I improve the color accuracy of my Realme camera photos?
Adjust the white balance settings to match the lighting conditions. Experiment with different shooting modes. Some editing apps can further improve color correction.
Final Thoughts
Addressing Realme camera quality problems often involves a systematic approach. By following the troubleshooting steps outlined in this guide, you’ll significantly improve the quality of your photos and videos. Remember to start with simple steps like cleaning the lens and checking for software updates before moving to more advanced techniques. Don’t hesitate to seek professional help if the problem persists after trying all the solutions presented here. Enjoy capturing stunning memories with your Realme phone!


